There are two types of network firewall stateless and stateful. Stateless firewall is easy to configure and must have for any device connecting to the Internet. Synology and other NAS brands like QNAP has stateless firewall build in.
Synology SRM has a built-in SPI (StatefulPacket Inspection) firewall, which is a stateful firewall and offers more protections. This article focuses on DSM stateless firewall only.
Stateless Packet Filtering Firewall
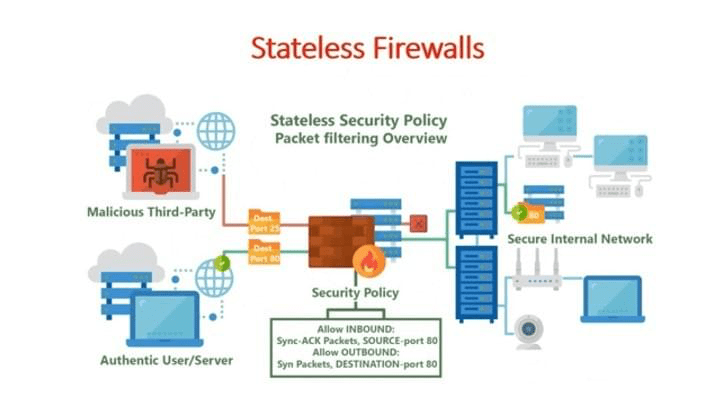
image src : https://www.youtube.com/watch?v=z6IysoN-tTo
Stateless packet filtering is the oldest type of packet filtering technology and is still commonly used in most routers. The packet filtering rules applied on routers are called the firewall rules or Access Control List (ACL).
The filtering decision of stateless packet filtering firewalls is based on the source and destination address information (for example 18.1.2.3 ) in the network layer protocol and, in some cases, the source and destination TCP or UDP port (for example port 22,80) information in the transport layer protocol of the packets.
When setting up a Synology NAS (or evenwith QNAP NAS) there are several things that you must consider. One such thing is the firewall which is used to protect a network from
unauthorized access and misuse. Setting up the firewall properly is important because it prevents unwanted connections and attacks.
Step by Step Guide

Now, I will show you how to set up the basic firewall settings on a Synology NAS DS411j+. You'll learn about the different types of firewalls and how each one works. Then, I'll walk you through the process of configuring the firewall settings on your Synology NAS.
You'll see how to block certain ports and protocols and how to allow specific applications and protocols to pass through the firewall. Finally, you'll learn how to configure IP address restrictions so that you don't accidentally give out information about yourself or your organization.
To use this tutorial, you'll need the following:
1. Your Synology NAS DS411J+
2. An Internet connection
3. A computer in the same network with Synology NAS.
In this article, we are going to explainhow to set up the firewall on a Synology NAS device. We will use our example Synology DS411 model, but it should work for most models.
ALLOW INCOMING CONNECTION
The actual setup process for the firewalls on a Synology NAS is simple. All you need to do is open the control panel and select Security. Then, select Firewall, enable firewall and apply thesettings. This will allow you to configure the firewall according to your needs.
First, let us go into the "Firewall Rules".
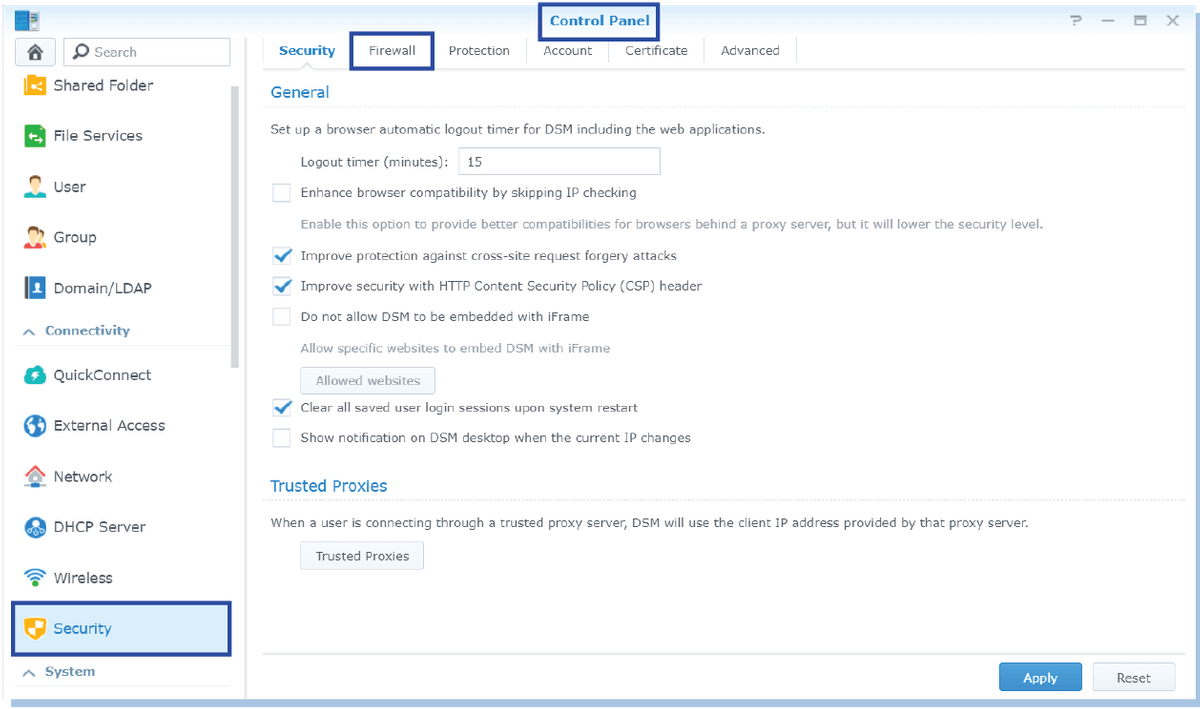
1. Click on Add New Rule.
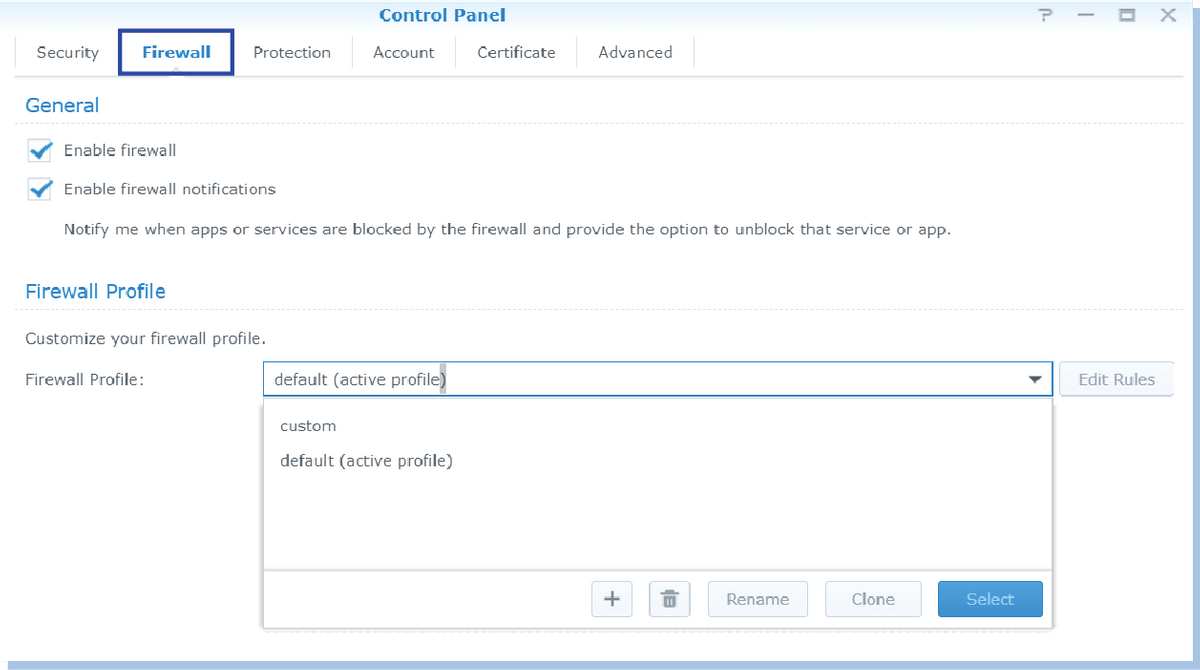
2. Name the rule something like "Block All Traffic".

3. Select the type of rule - either "Permit", "Deny", or "Block all".


4. In the "Action" drop down menu, select Permit.
TIME FOR SETTING UP THE FIREWALL ON SYNOLOGY NAS
The default firewall settings on a Synology NAS are pretty open. Anyone with an IP address on one of the network ports can connect to it remotely. This includes people inside your local network (usually with ip address 192.168.x.x ), as well as people outside your local network.
Note: 192.168.x.x and 172.16.x.x IP addresses are private addresss and thus only reachable within internal network.
If you want to restrict remote access to specific devices, you must set up port-based firewall rules. These rules apply to every device connected to the NAS. You cannot add exceptions for particular
devices.
Synology default configuration is to use port 5000 for HTTP and 5001 for HTTPS. Therefore, remember not to block TCP port 5000 and 5001 with firewall rules.
LIMITING THE ACCESS: IP, SUBNETS, RANGES
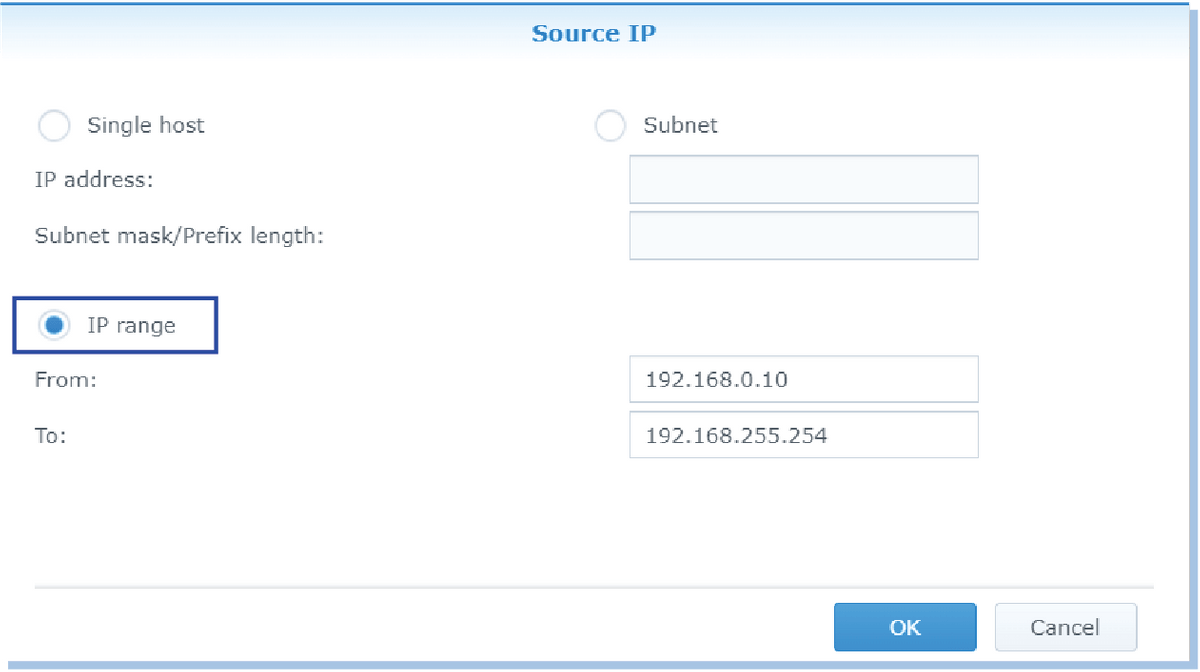
We just created a firewall rule that can be access/ allowed anyone to your Synology NAS on these ports, but we can modify the rules to limit the access. Here's how.
The following example illustrates how to edit a firewall rule that you created earlier. Select the firewall rule you want to modify. Click Edit. On the left side of the screen, select Source IP Address.
Under the dropdown list, choose either Specific IP or Specific IP Range. If you selected Specific IP, enter the IP address range you want to permit.
For instance, if you wanted to permit access to 192.168.0.10 - 192.168.0.*, enter 192.168.0. - 192.168.255.254.
To prevent access to the entire 192.168.0/24 subnetwork, enter 192.168.*
On the right side of the screen, underDestination IP Address, choose one of the following options: Specific IP, Specific IP Range, or Anywhere. If you chose Specific IP, enter the specific IP address you wish to permit.
If you chose Specific IPv6 Range, enter the IPv6 address range you wish to permit. Finally, if you chose Anywhere, enter * to indicate that you wish to permit access to anywhere within the specified network.
To prevent access to the whole192.168.0./24 subnetwork, enter *.
Click Save Changes.
LOCATION LIMIT
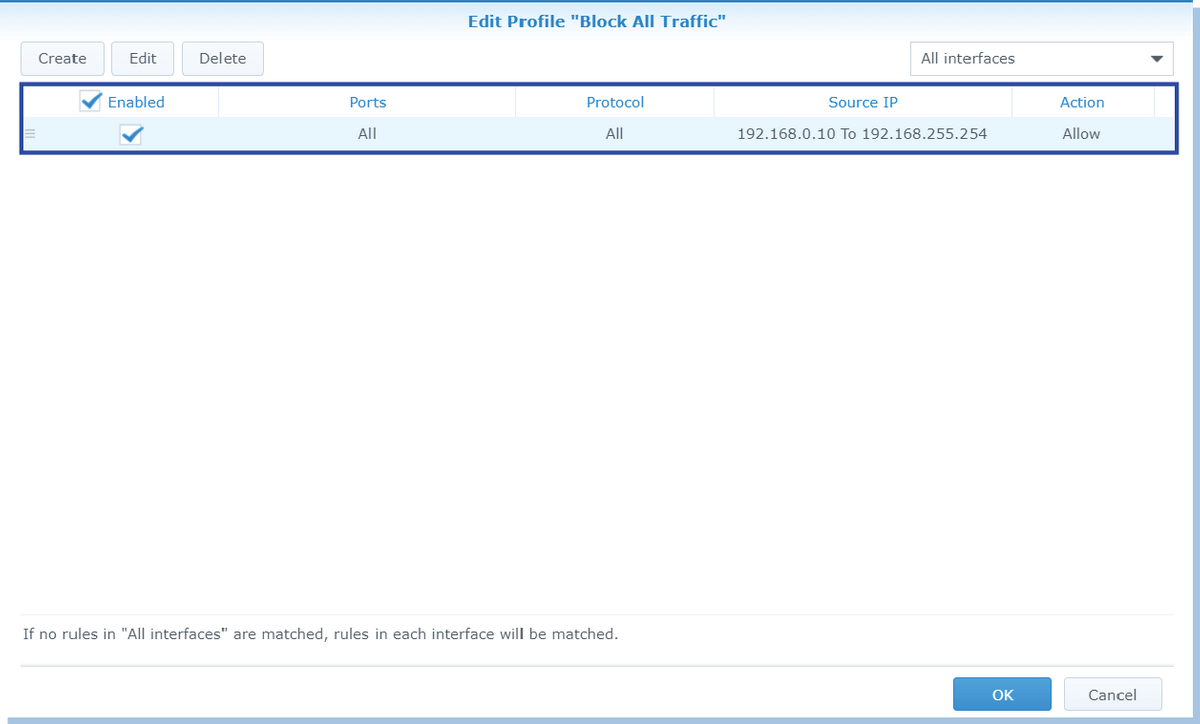
If you want to restrict access to a specific location, you can do it by limiting access to a single IP address.
This option works best if you're trying to block access to a public Wi-Fi hotspot or a guest network at a hotel. If you want to block access to a particular country, you can use one of the following methods.
To limit access based on a public IP address, set the source IP to match the IP addresses from the list of restricted locations. You can find out the public IP address of any computer on the Internet by typing "ipconfig /all" into the command prompt window. Then add the IP addresses of each location you'd like to block.
LAST STEP, BLOCK ALL
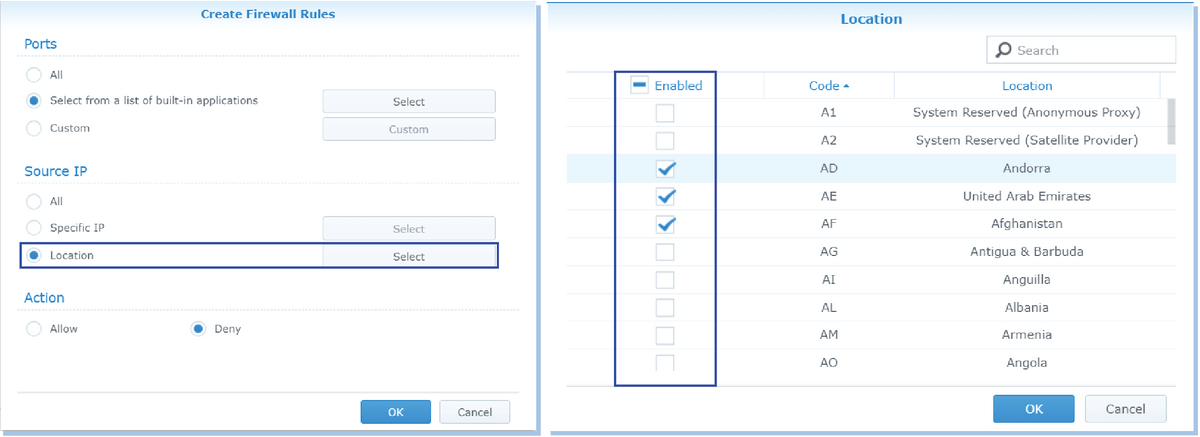

If you create the 'block all rule', then it'll function as we created the rules prior to this. Without this 'block all rule' turned on, the stateless firewall is not in protect mode, no traffic will be blocked here, and it's just no different than not having the rules we just did in place.
THE FASTEST WAY INSTEAD OF THE FIREWALL
Firewall requires manually entering IP address one by one and maintain firewall rules. For a small number of IP addresses and the addresses are fixed, stateless firewall rules can be useful.
If you are looking for a more advanced firewall or the IP address changes, you should use DNS firewall which block communication based on web domain names (like *.example.com).
With all the awesome features and effective solution, this solution offers way more secure than simply just setting up firewall.
It removes all types of malware including spyware, ransomware and viruses. It also acts as a first line of defense against cyber threats, which is very convenient as a one click solution for your NAS,
including QNAP NAS instead of setting up your firewall manually while still having risks of being vulnerable.

